
Remote Desktop
Remote Desktop is a very useful tool for remote collaboration. It can be used after the nConnect client connects to the server. Let's do it.
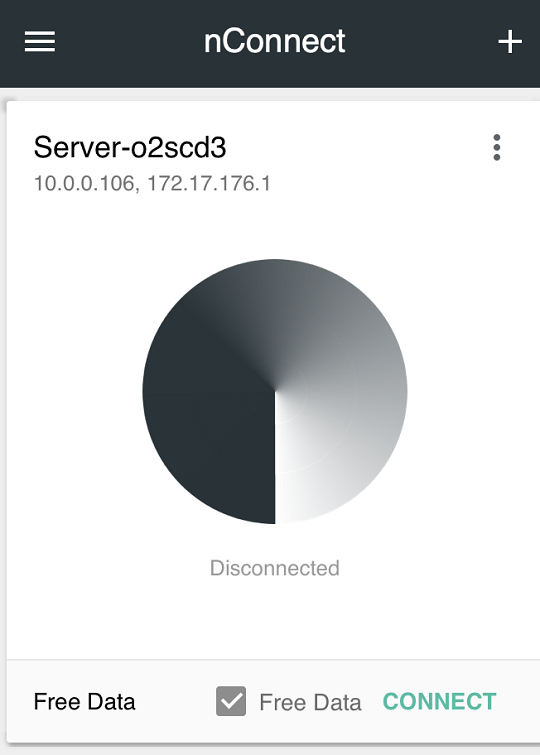
Establish connection between server and client.
Start nConnect Server First, we start an nConnect desktop for Windows. Click on the top left menu, select nConnect Server and click START to start nConnect Server:
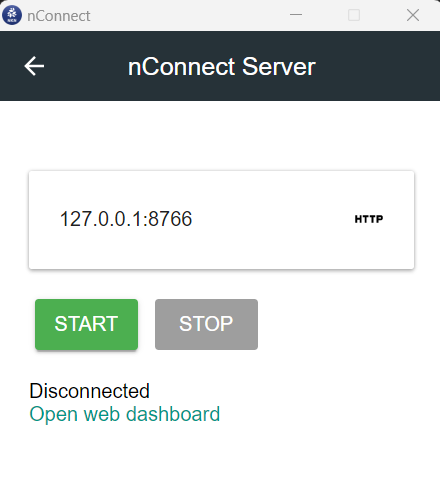
After nConnect Server is started, we click Open Web Dashboard, we can see the server's web page:
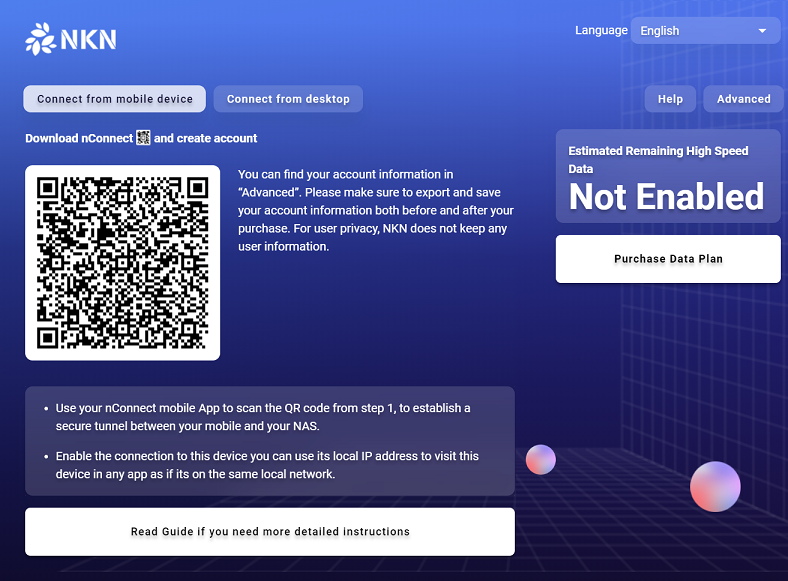
- Using nConnect Mobile App to add nConnect Server Now open the nConnect app on your mobile phone, scan the server's QR code to add the server address, and turn on the connection:

- Using nConnect Desktop on another computer to set up nConnect Client
We will use a MAC to install the nConnect client. You can use any other type of computer to access your server. Follow the same procedure.
Now open nConnect on the MAC:
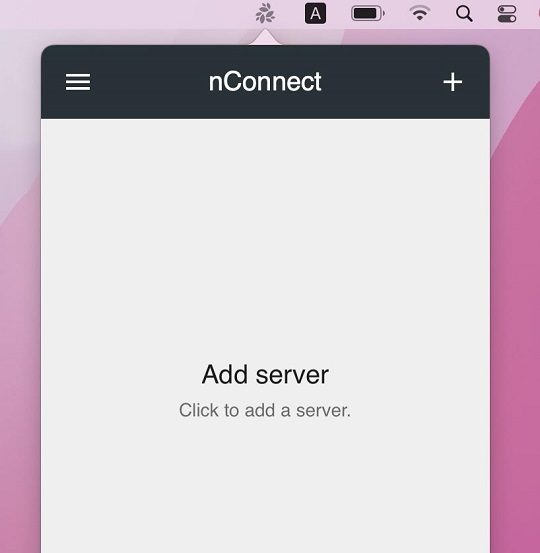
Click Add Server, a QR code will be displayed.
Using nConnect Mobile App to Synchronize Server Information to Desktop Now let's synchronize server information to the nConnect desktop. Open the nConnect app on your mobile device. On the home page, click on the server item:
On the server details page you will see Add to nConnect Desktop.
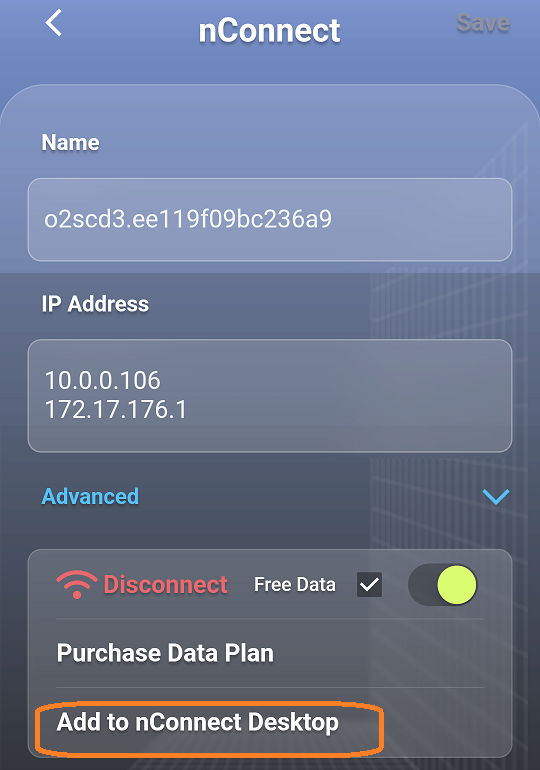
Now scan the nConnect desktop QR code with your mobile nConnect.
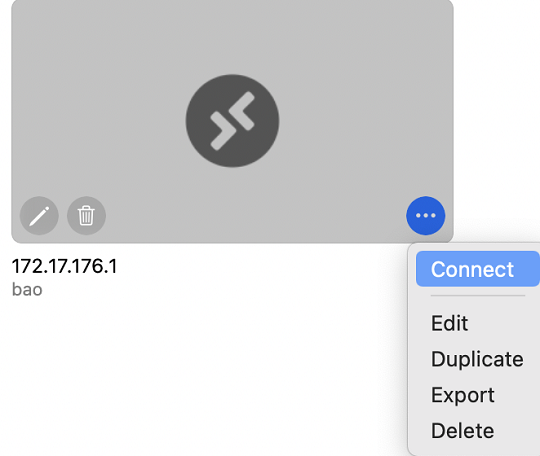
You will see that nConnect desktop has been added to the server. Now click "Connect" on nConnect desktop, you will see it is connected to the server:
Great, now the nConnect desktop Mac and the nConnect desktop Windows have established a tunnel.
Windows Remote Desktop
Windows Remote Desktop is natively supported by Windows system. People can use it to access remote Windows easily through nConnect even if they don't have public IP.
- To enable remote desktop access On nConnect Server Windows computer, go to System, select Remote Desktop, turn on Remote Desktop to allow remote connection:
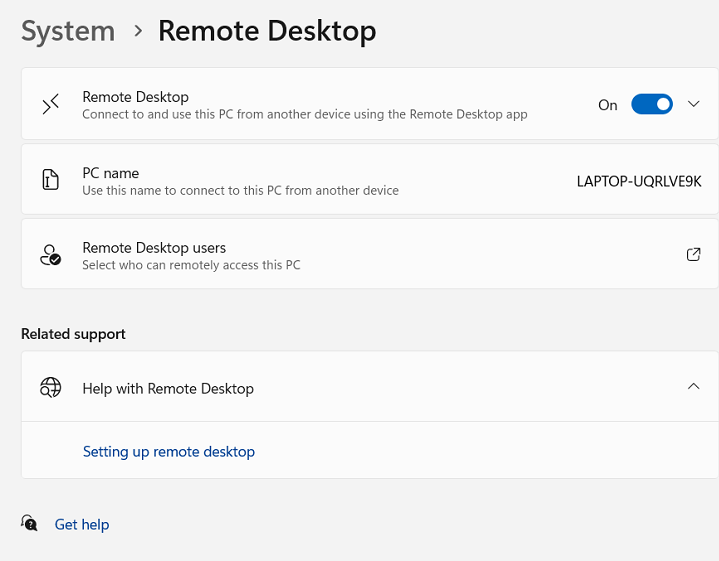
And add the usage that can connect via Remote Desktop.
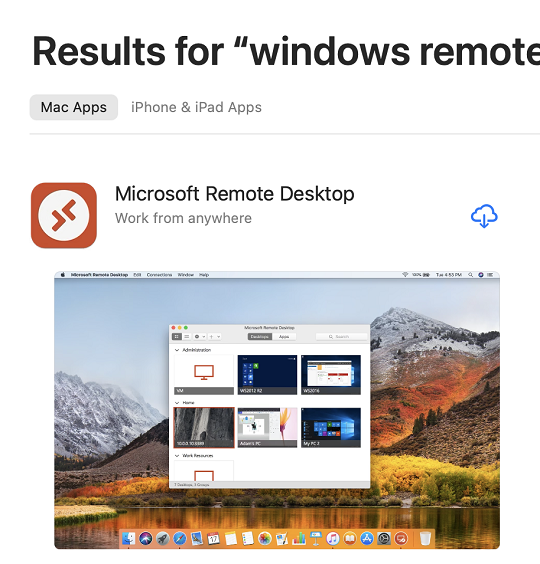
- Downloading Windows Remote Desktop to the nConnect Client Mac computer Search for Windows Remote Desktop in the Apple Store:
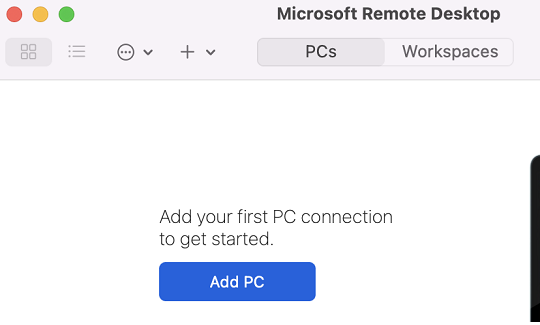
Install Windows Remote Desktop on the Mac and Add PC, add the local IP of the nConnect Server computer, user account and password:
Ok, click menu to *connect
Great, you can now access your Windows computer remotely.
About TeamViewer
TeamViewer Remote is a remote access software that allows users to connect to another computer from anywhere in the world. In this section you'll learn how to set up your devices and how to connect to remote devices via nConnect connection.
After setting up the nConnect server and client tunnel, you can refer to the TeamViewer Documents
nConnect MAC VNC Remote Control Tutorial
Please refer to forum.nkn.org article as well: nConnect MAC VNC Remote Control Tutorial