
Get Started
nConnect allows you to securely connect to remote machines without the need for a server, public IP address, or publicly exposed ports. It features end-to-end encryption for the highest level of security and multi-path aggregation for maximum throughput.
Let's connect two devices using nConnect. We'll use ping and ssh to test the connection. Any two devices that can run nConnect will do: cloud server, home desktop, embedded Linux device, NAS device, mobile phone, etc.
Both devices can be in different locations, home or office, cafe shop or cloud server base.
The rough outline is:
- Set up nConnect Server
- Set up nConnect Client
- SSH server local IP from remote client
In this case we assume we need to remotely access an Ubuntu Server' at home from ourWindows computer' wherever we are. The Ubuntu Server does not have a public IP, it is behind the Internet gateway at home. And our Windows computer also has no public IP. We can access Ubuntu server from home, cafe, office or airport, anywhere we can connect to Internet.
Preparation
In this simple case, we prepare a Linux(Ubuntu) server, which is located at home, and a Windows computer, which is a mobile working device, sometimes we use it at home, sometimes we use it at office, and sometimes we use it at cafe shop.
Both the Ubuntu server and the Windows computer have no public IP, and both devices run behind some Internet access gateway. In our case, we want to enable the mobile Windows computer to access the home Ubuntu server anytime, anywhere when Internet is available.
It's very easy by installing nConnect on both devices. Let's do it.
Setting up nConnect Server on an Ubuntu Server
In this case, the Ubuntu server will be remotely accessed by a Windows computer. To remotely access our Ubuntu Server, we first need to set up nConnect Server on the Ubuntu server. Follow the steps below to install nConnect Server on Ubuntu:
Download the nConnect Linux binary release from the nConnect repository. You can always download the latest nConnect from the nConnect github repository: nConnect release
Let's download nConnect for Ubuntu:
$ mkdir nconnect
$ cd nconnect
$ wget https://github.com/nknorg/nconnect/releases/latest/download/linux-amd64.tar.gz
$ tar xzvf linux-amd64.tar.gz
$ cd linux-amd64
Get nConnect Server address: The nConnect Client connects to the nConnect Server using the server address. So first we get the server address as follows:
$ ./nConnect -s --address
nConnect.gzwiy5.4c01b508fd9e5432633c6b098e6a0f166fdfd6a57a2c2313d08711ef1c4a4725
Copy the string leaded by nConnect. show on your terminal, this is server's address. We need this address for client to connect to server.
Start the nConnect server: First we open port 8001 from firewall, then start nConnect server:
$ ./nConnect -s --admin-http :8001--admin-http :8001 launches the admin web dashboard at http://local-ip:8001. You can visit this address in your browser to change various configurations (e.g. access control), bind to the nConnect mobile client, etc. Do not make this port public, as anyone with access to this endpoint can change your configuration. If you want the best security, disable the admin dashboard when you are done using it.
Great, the nConnect server is started. Now you can open the nConnect Server web page:
http://local-ip:8001Please replace local-ip with the local IP address of your own computer. You can see the home page like this:
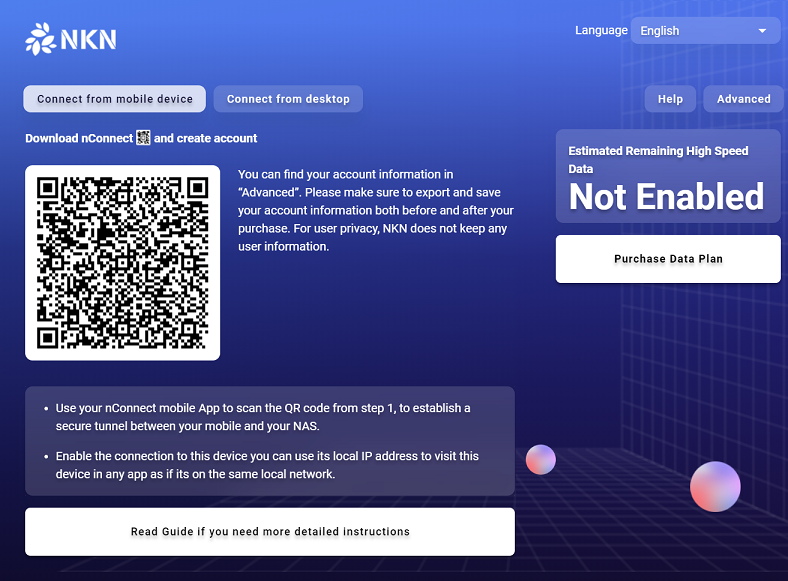
On this web page we can see a QR code. Now let's go to the next step.
Install nConnect APP on mobile phone
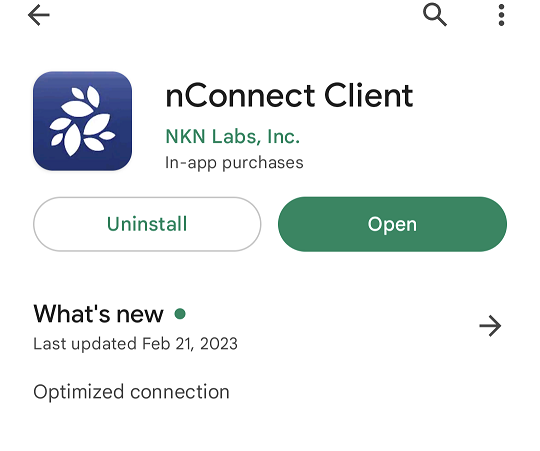
For a better experience, we recommend that you download the nConnect App from the Apple Store or Google Play.
Installing nConnect App Make sure you are downloading the correct nConnect published by NKN Labs, Inc. You can see the NKN logo as shown below:
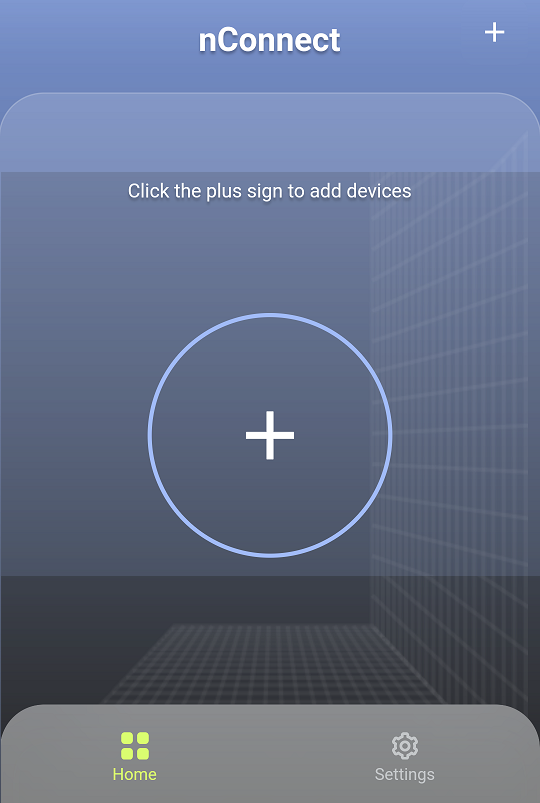
Scan the nConnect Server QR Code Open your mobile phone's nConnect app, on the app's home page, point to + to start scanning the QR code displayed by the nConnect Server web page.
After scanning, the mobile app has connected to the server. Now switch on the connection:
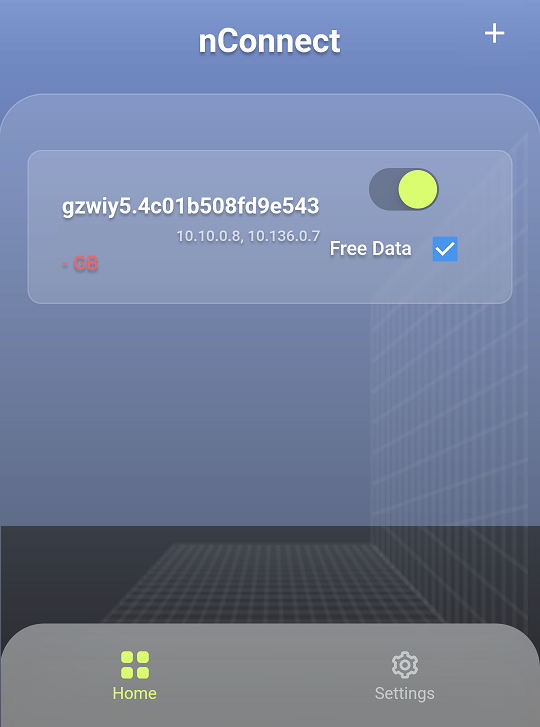
Congratulations, now your mobile can access the Ubuntu server as if it's a local server. Because our Ubuntu server has no service for the mobile phone. Let's set up the nConnect client on the Windows computer.
Setting Up nConnect Client on a Windows Computer
Now let us set up the nConnect client on the Windows computer. As with the server, we download nConnect from the nkn.org website: nConnect Download
After downloading, install and run it. After starting, it should look like this
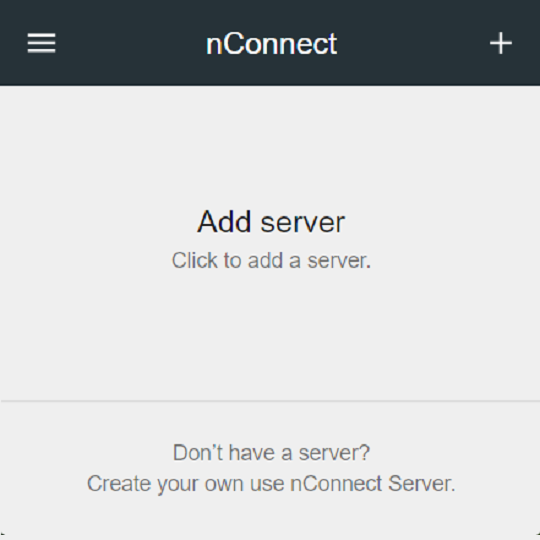
Click Add Server, it will show a QR code.
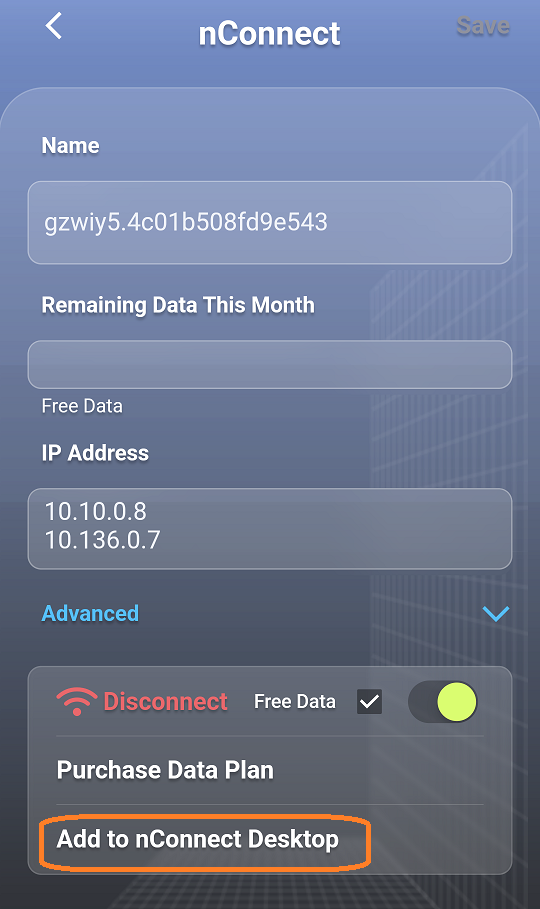
Using nConnect Mobile App to Synchronize Server Info to Desktop Now let's synchronize server information with nConnect Desktop. Open the nConnect app on your mobile device. On the home page, click on the server item:
On the server details page you will see Add to nConnect Desktop.
Now scan the nConnect desktop QR code with your mobile nConnect.
You will see that nConnect desktop is also added to the server:
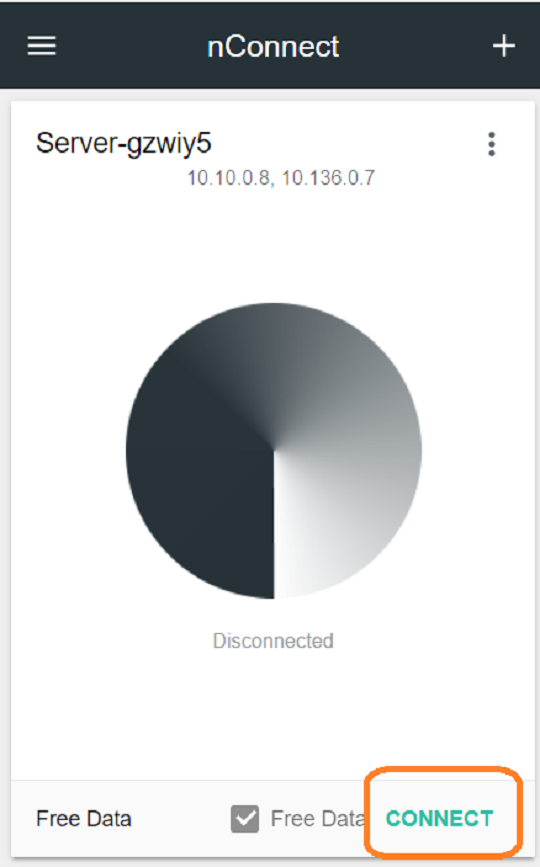
Now click "Connect" on nConnect desktop and you will see that it is connected to the server:
Great, now the nConnect desktop and the server have established a tunnel. From the client Windows computer, we can connect to the Ubuntu Server just like a local computer. Let us test it.
Add Client Address to Server Manually.
If we don't want install nConnect on mobile phone. we can add client address to server as authorized client by these steps:
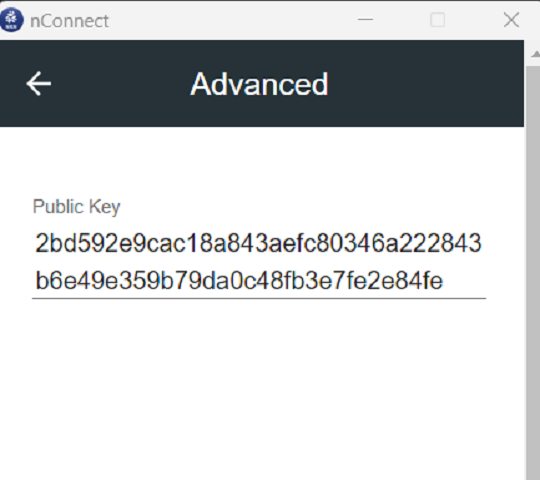
Open nConnect Client , client Menu, Advanced:
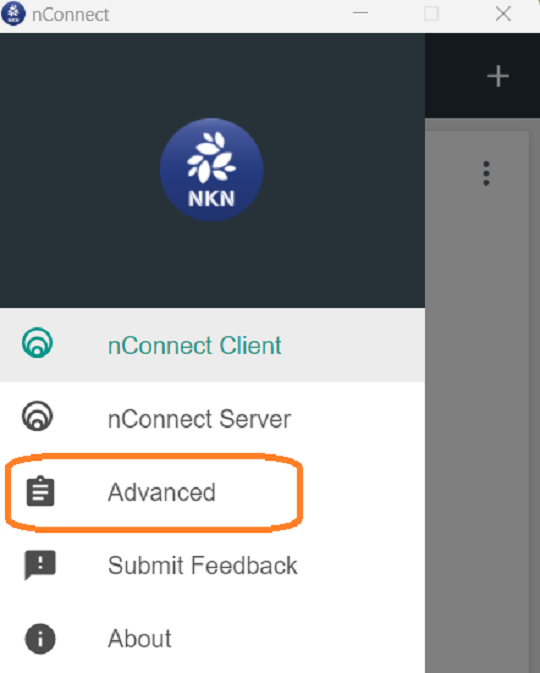
Copy client public key:
Edit server's config.json
Log into ubuntu server, and cd to nConnect directory, you could see config.json file, edit it:
testnet-08:~/nconnect/linux-amd64$ ls
config.json  nConnect  web
testnet-08:~/nconnect/linux-amd64$
testnet-08:~/nconnect/linux-amd64$ vi config.json
Add client public key to "acceptAddres", and / or "adminAddrs" (if you would like administrate server by this client). Please add "$" at the address end:
{
  "identifier": "gzwiy5",
  "seed": "42ad069b3955dd79812d47980b5b450b97e310dbf93704deadaead7d5f5ab6c1",
  "acceptAddrs": [
    "2bd592e9cac18a843aefc80346a222843b6e49e359b79da0c48fb3e7fe2e84fe$"
  ],
  "adminAddrs": [
    "2bd592e9cac18a843aefc80346a222843b6e49e359b79da0c48fb3e7fe2e84fe$"
  ]
}
~
~
~
Restart nConnect server Now the nConnect should can connect to nConnect Server.
SSH Test
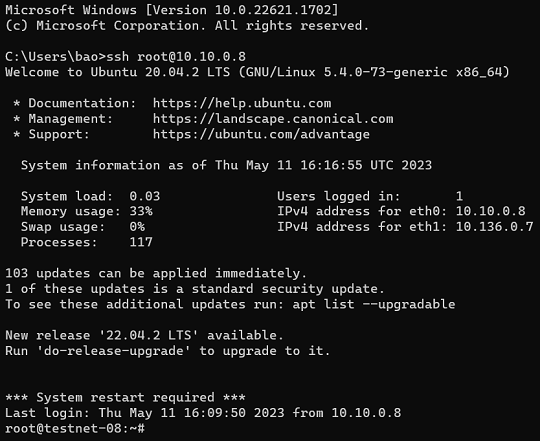
From nConnect desktop window, we can see Ubuntu server's local IP address. Open Windows CMD window, execute ssh command:
> ssh root@local-ip
Please replace local-ip with the server machine's local IP address.
Then we see it successful:
Now you are familiar with nConnect for Ubuntu, mobile phone and Windows desktop. Congratulations!